Document Sending
please read
If you do not have a DocuSign account connected when you are ready to send and sign documents, the Forms Live Sign Get Started screen will be displayed.
Check out our video tutorial or read the step-by-step instructions below!
Finalising Forms#
The form must first be Finalised before the signature process can start.
Click the
Finalisebutton at the top of the screen.Click the
Signingtab located in the right sidebarThe
Signing Optionpresented depends on yourAddonsettings.
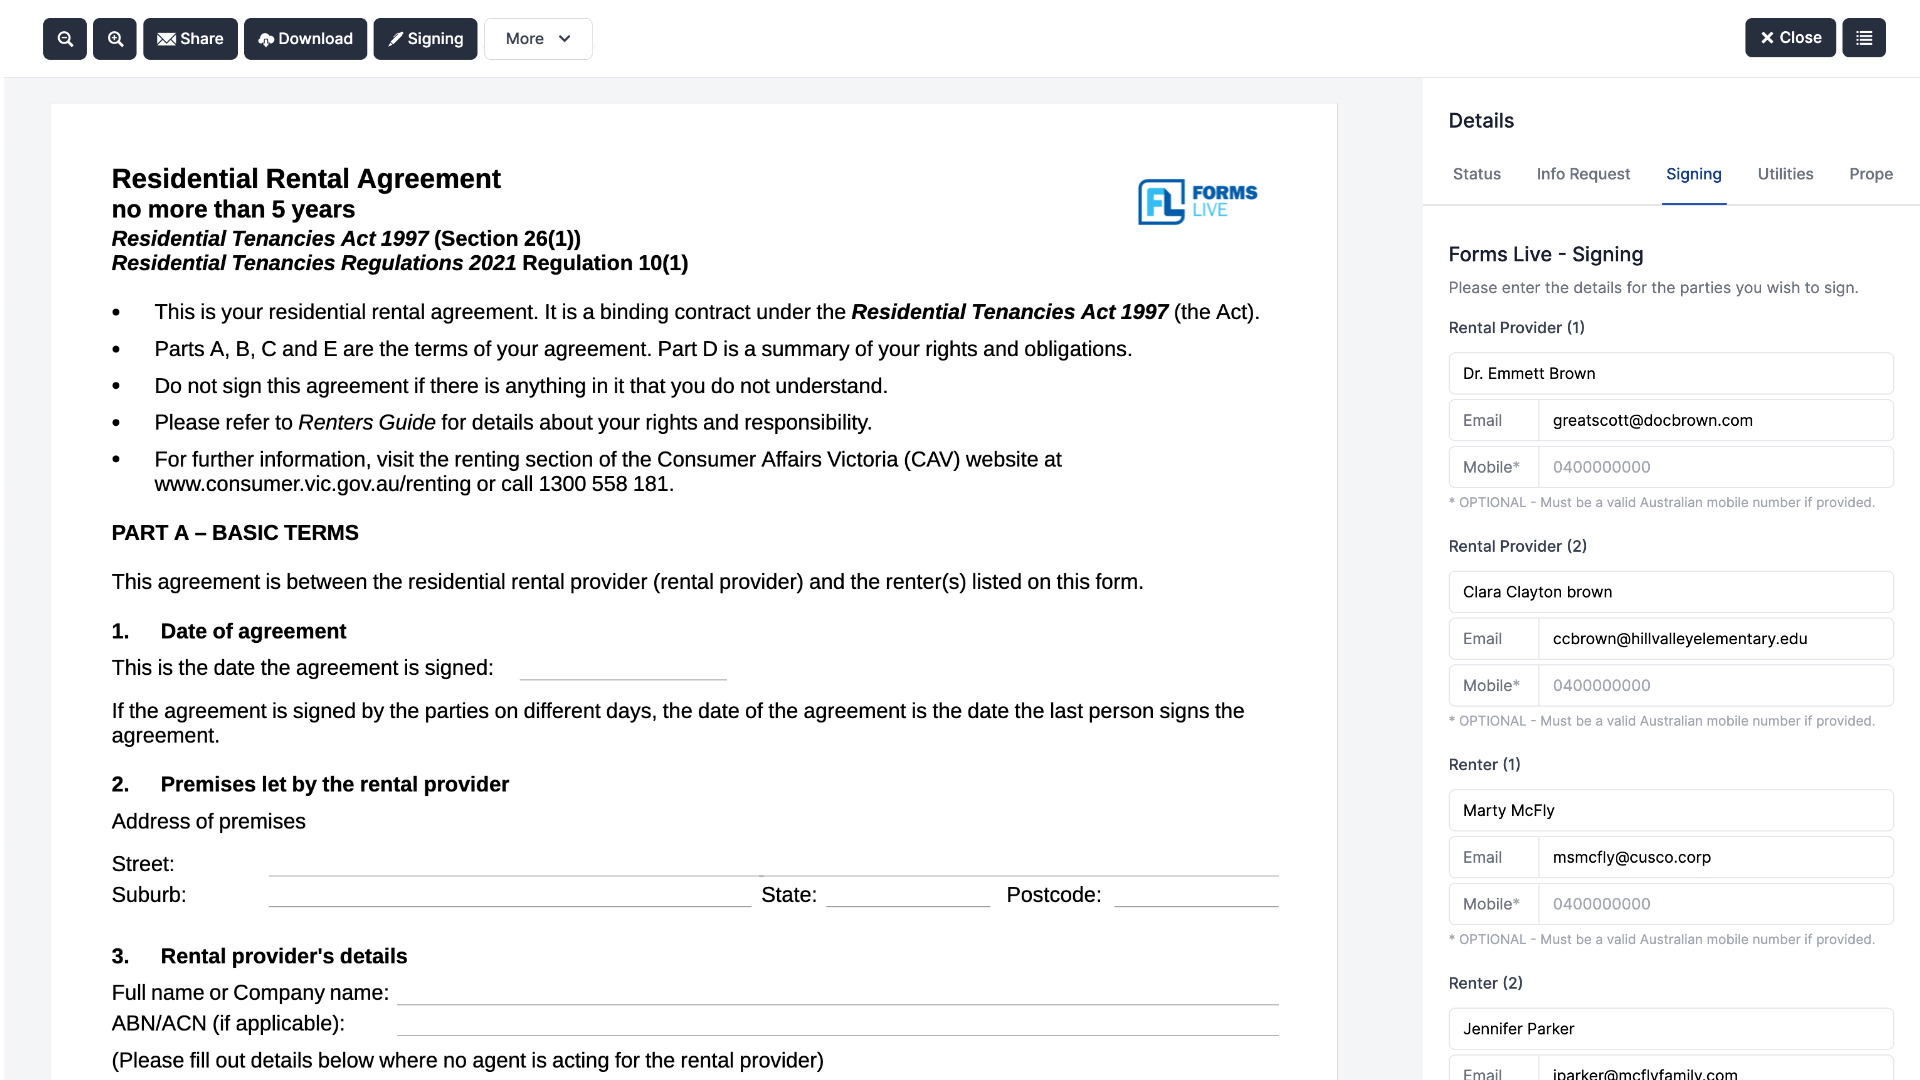
Sending Forms#
- Enter all fields relevant to the recipient(s).
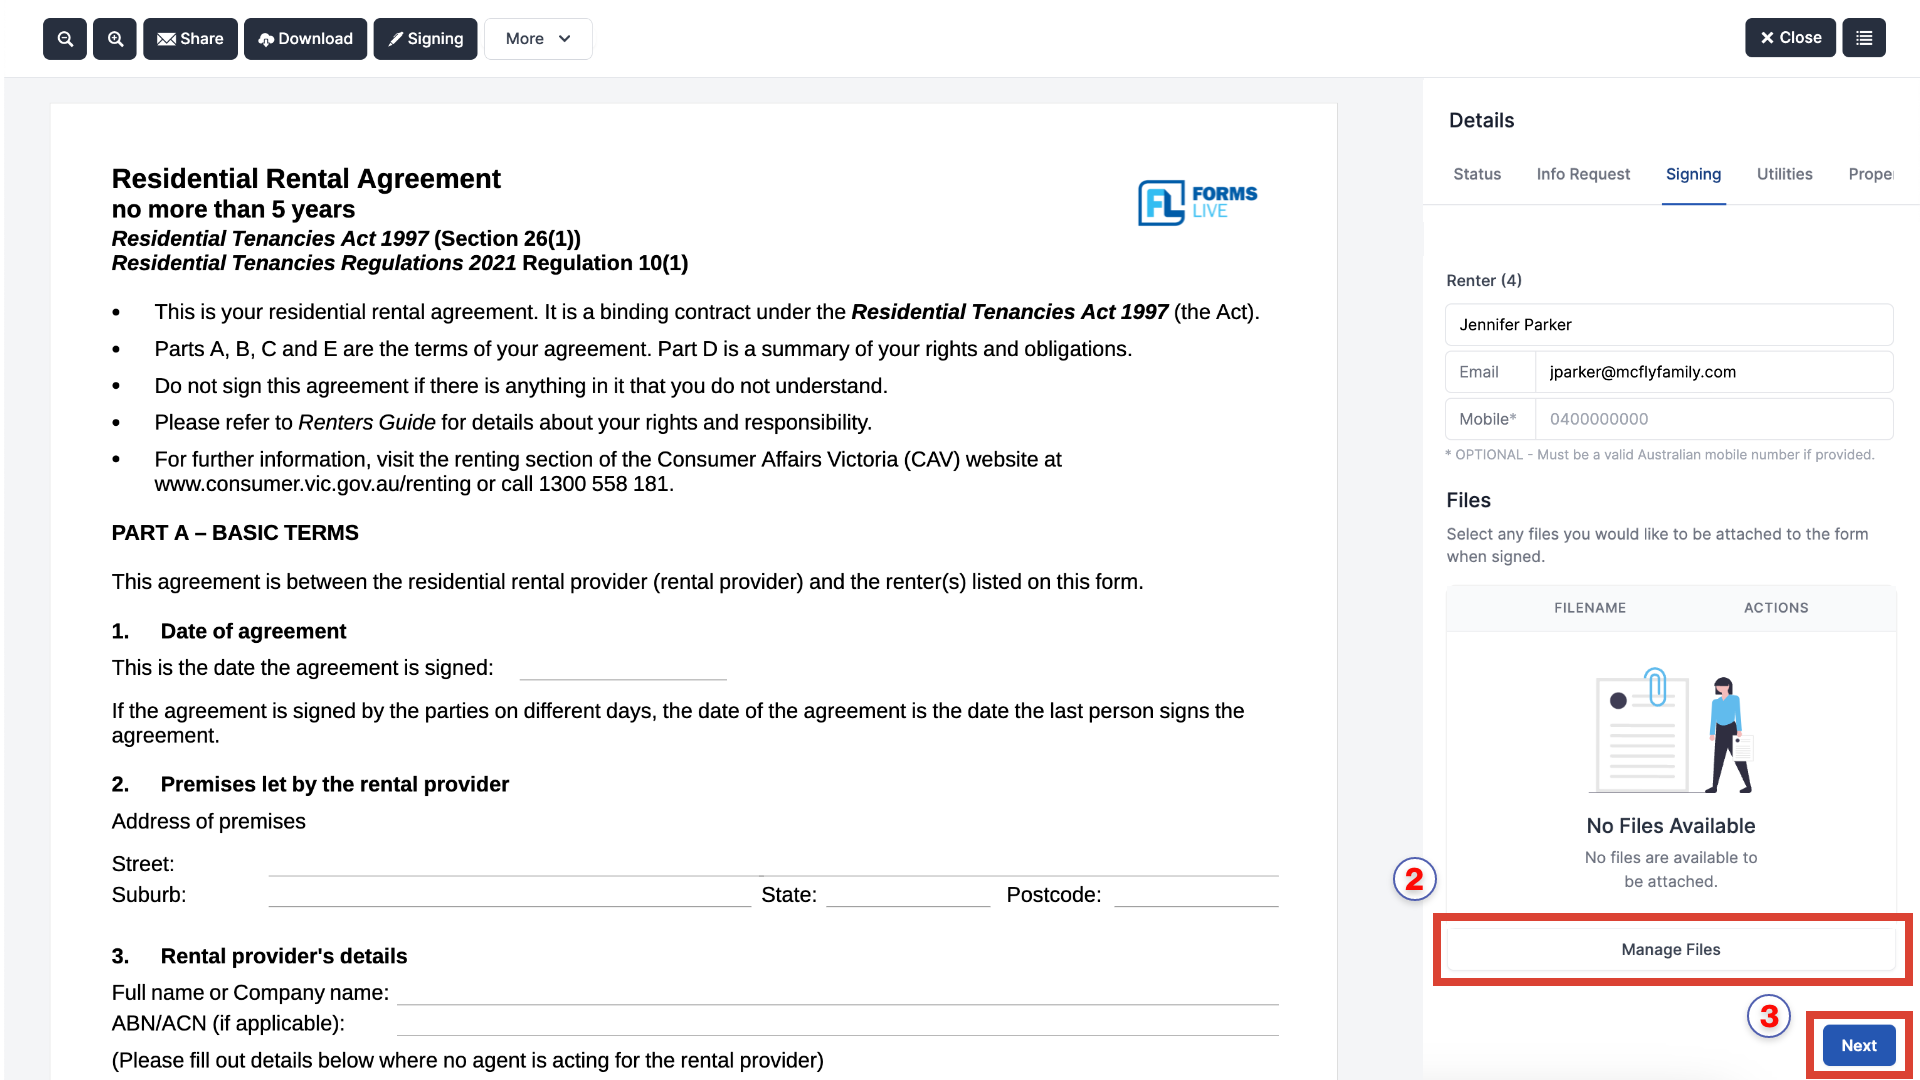
Attach any files you wish to get signed by recipients. Learn more aboue this process HERE.
Enter all the details and click
Next.
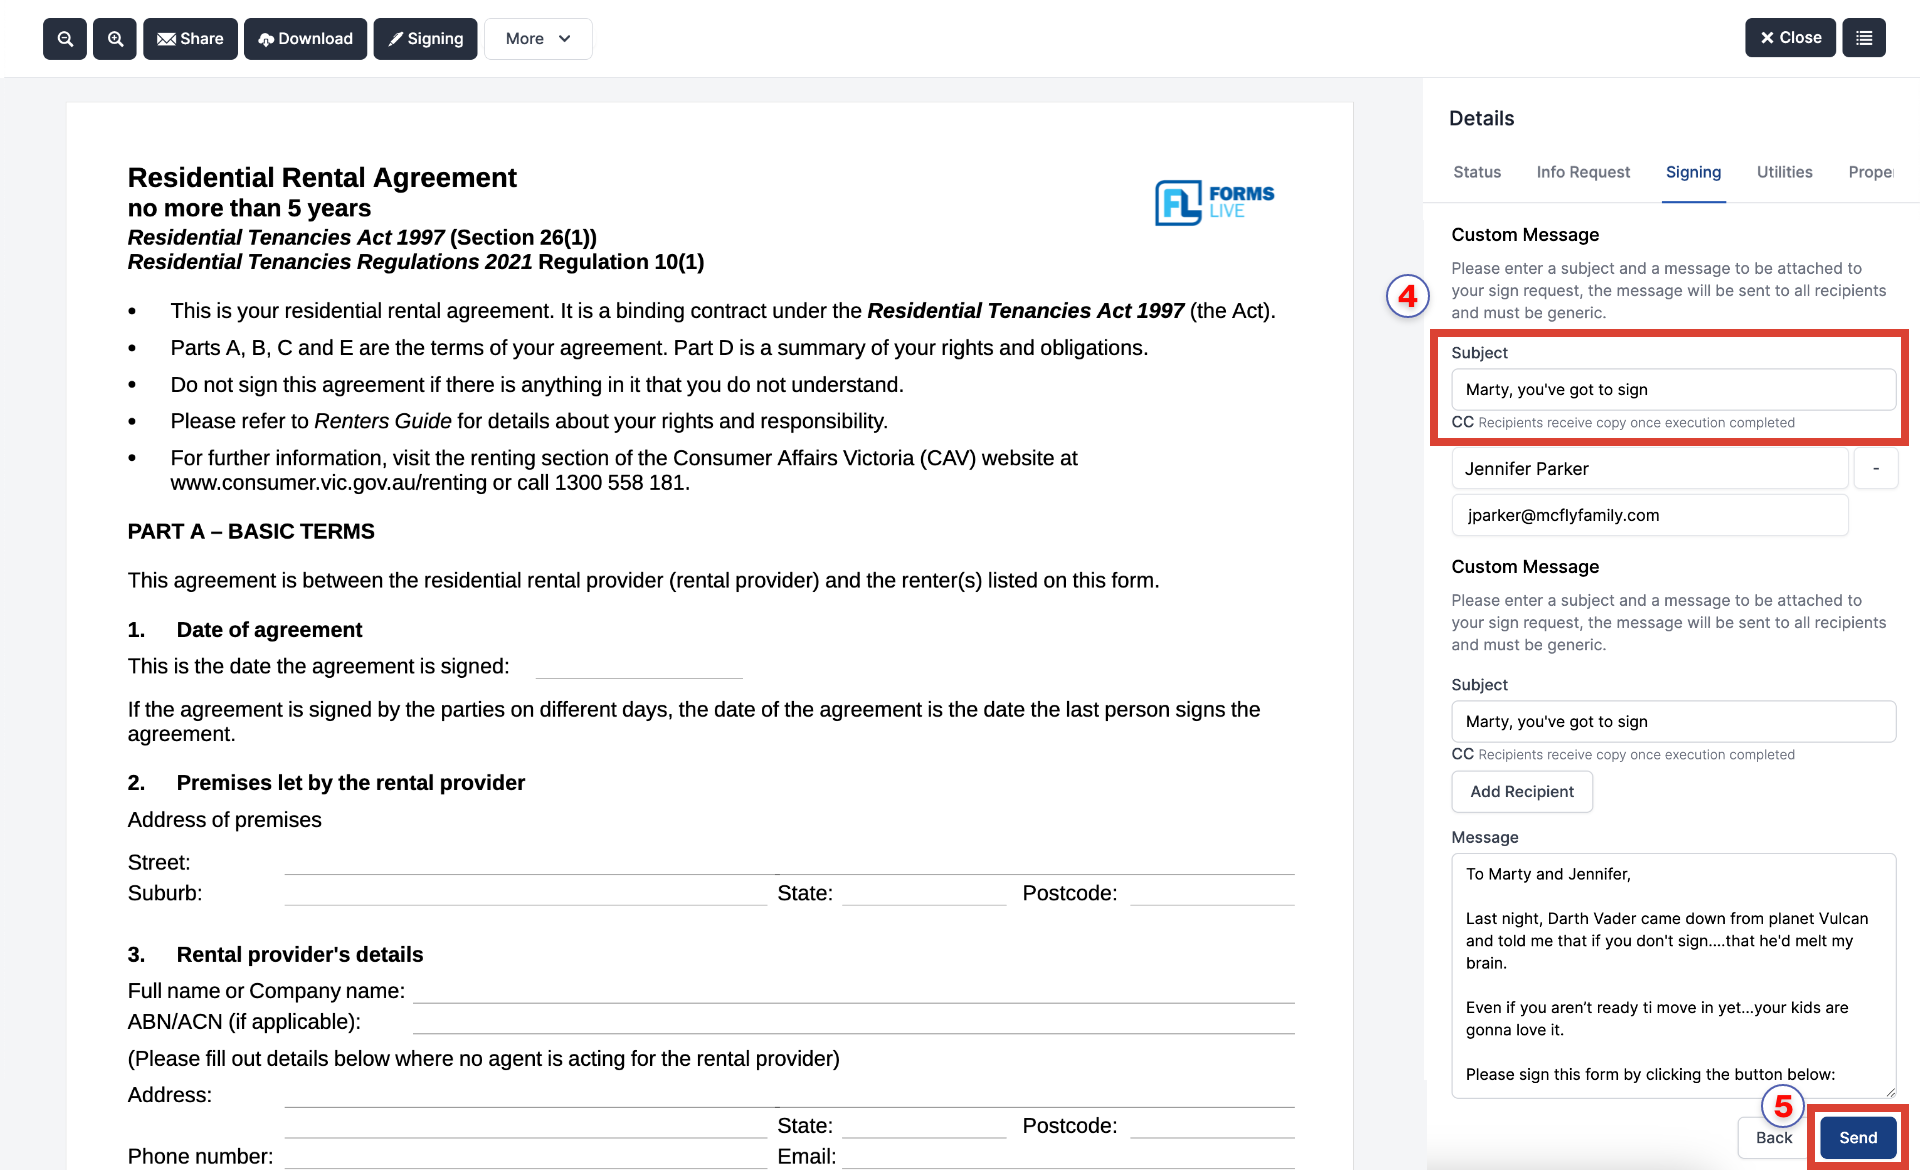
Enter the email
subjectandmessagewhich will be sent to all recipients.Click
Sendonce everything has been filled in correctly.
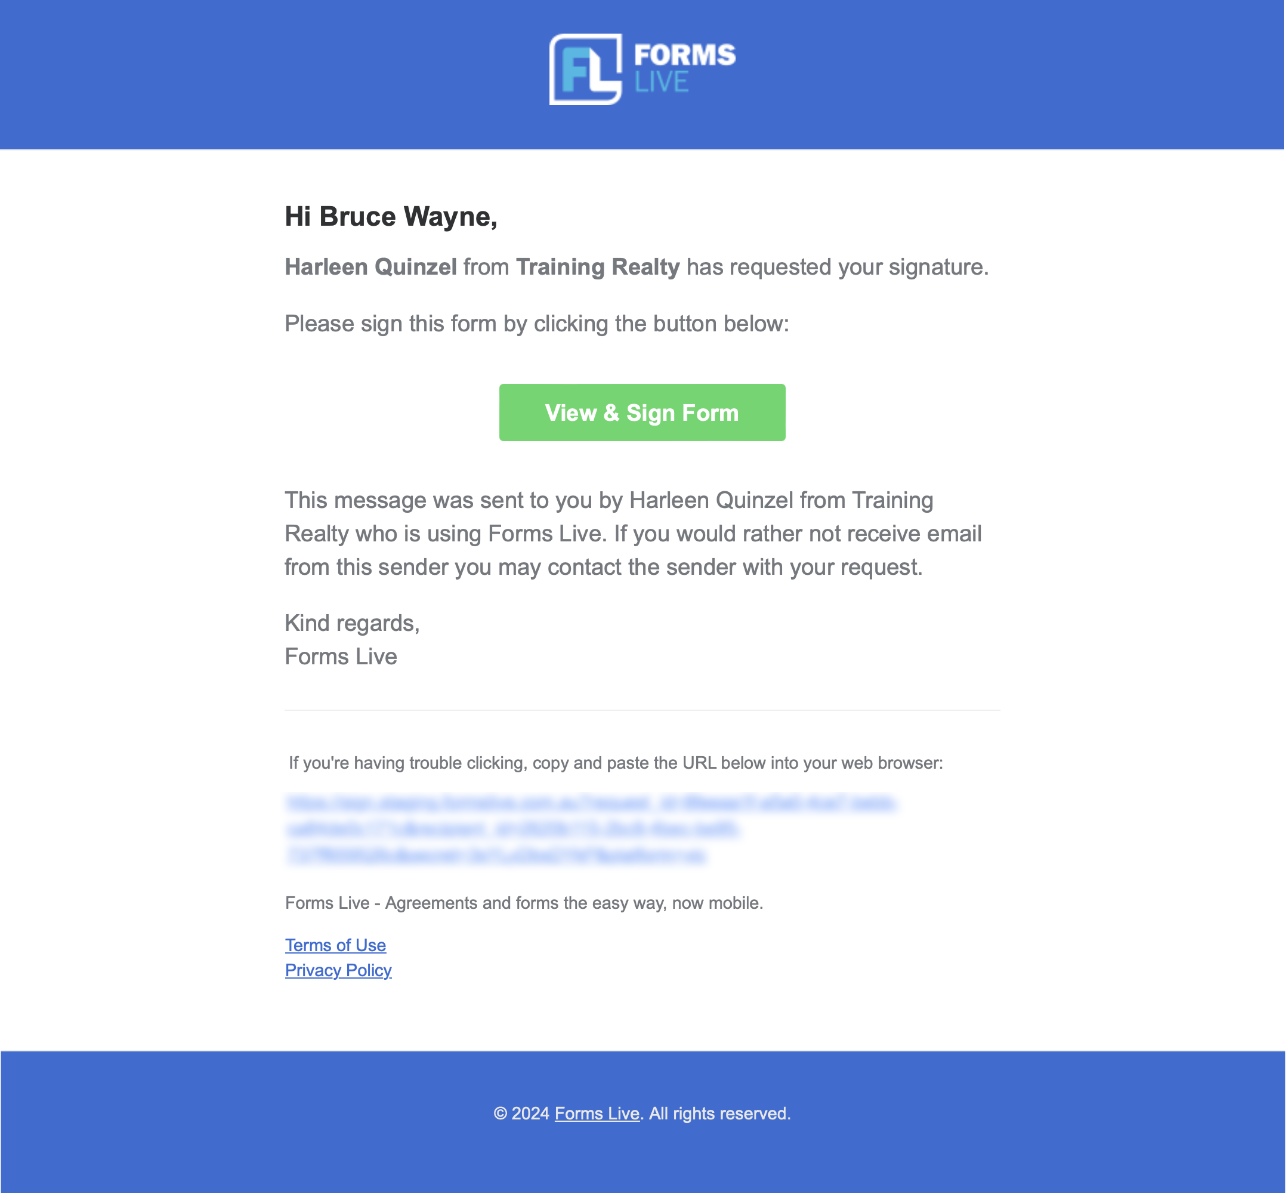
note
All recipients added in Step 1 will receive the following email. The Signing tab status will update in real time – timestamp included - as the documents move through the electronic signing process.
Signing Order#
info
Forms Live Sign allows you to specify the signing order of recipients. Once a group completes signing, the next group will be sent the request. All signatures will be sent for signing in ascending Group order.
Once you have entered all recipient(s) to their corresponding fields, the signing order can be managed.
- Click the
upward/downward arrowsto move the recipient into your preferred signingGroup.
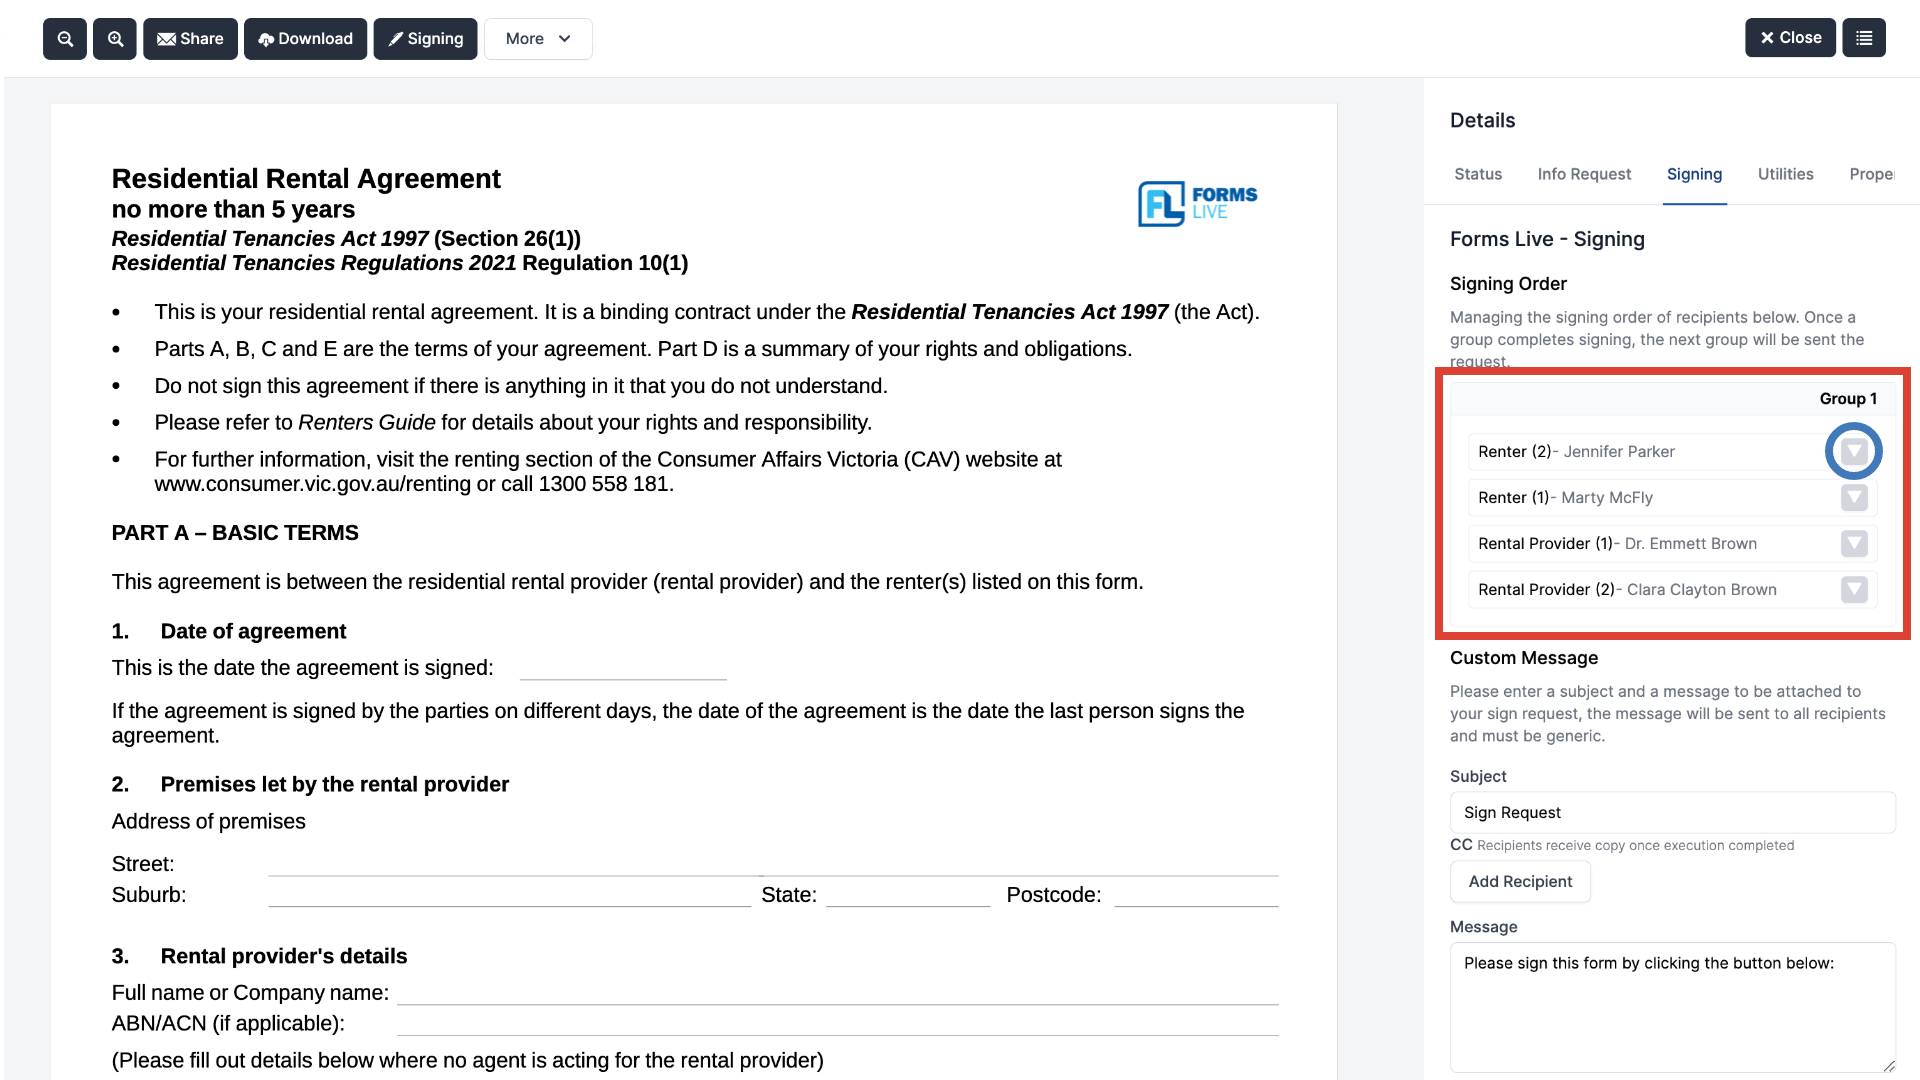
- Click the
downward arrowto create a newGroupwhen the recipient is last in the signing order
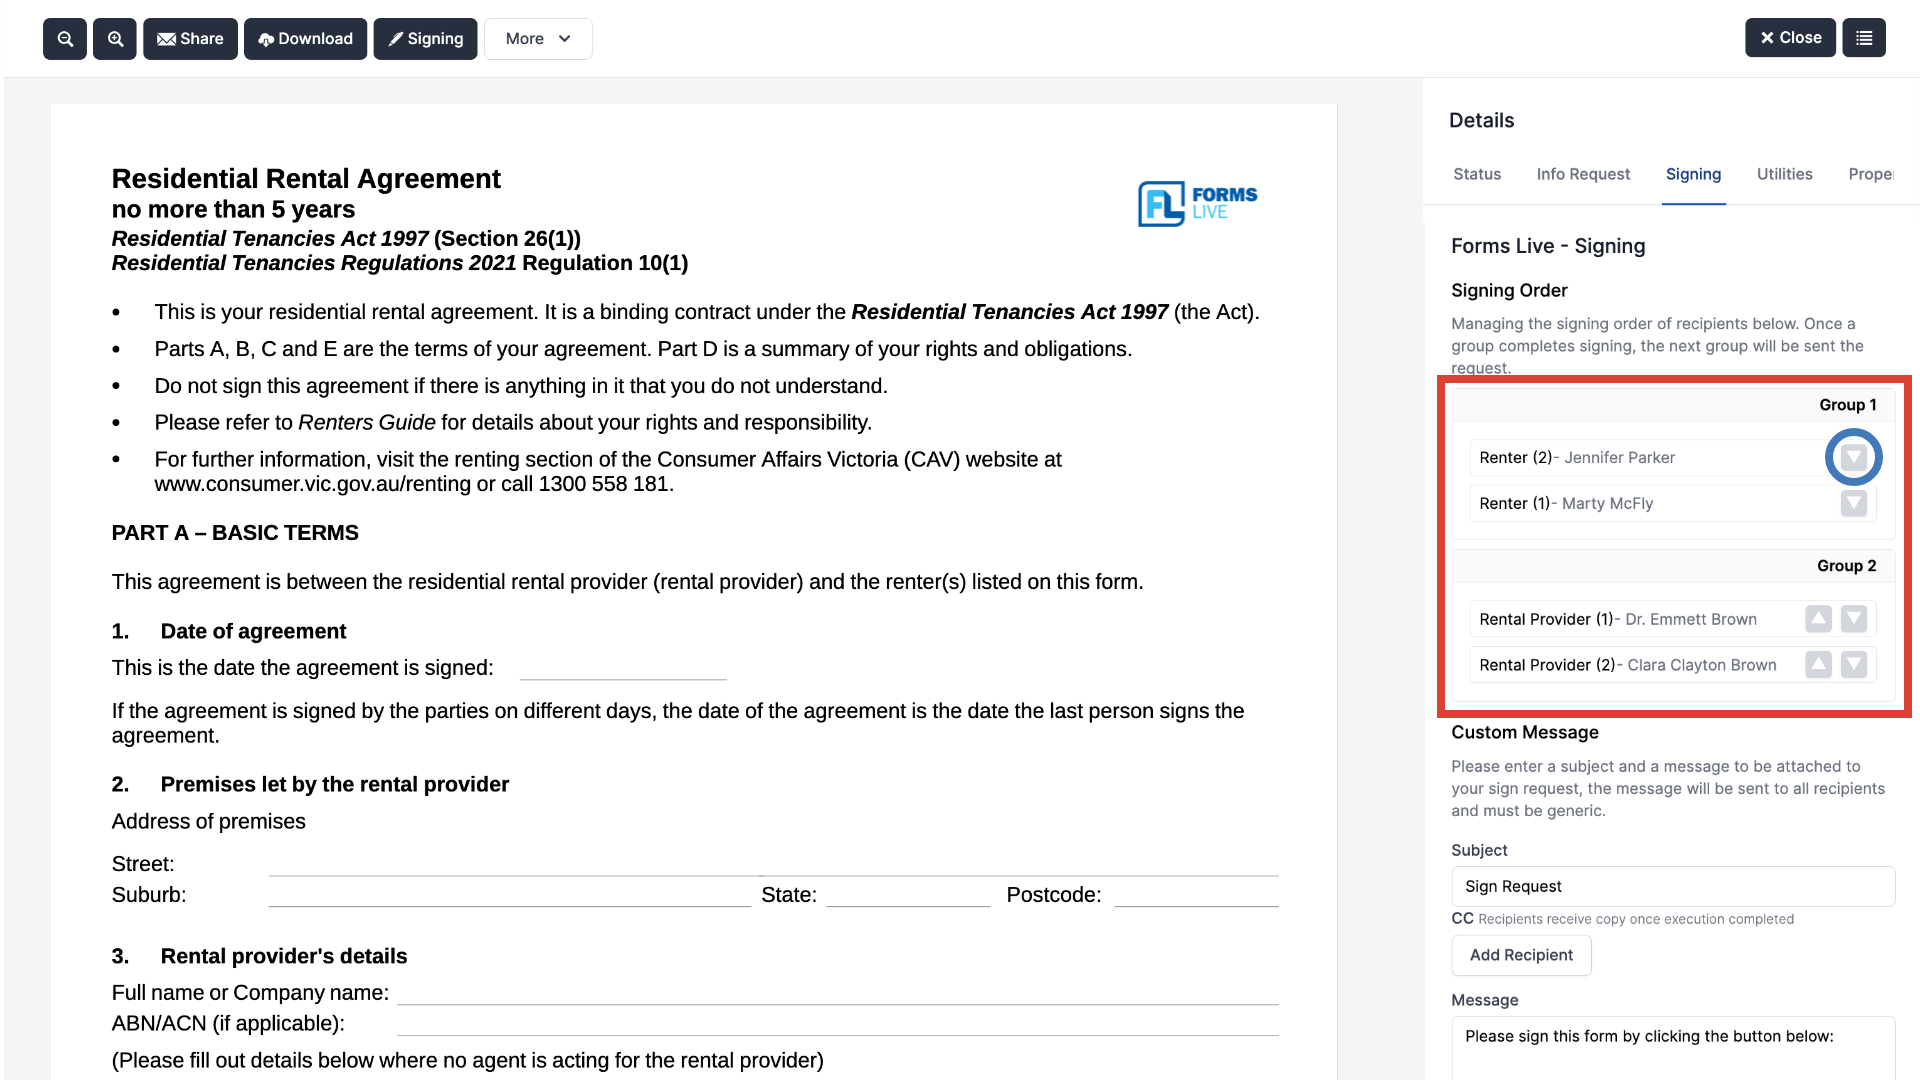
Multiple groups can be created, with more than one recipient assigned to each Group.

Delivery Status#
info
Once all parties have been notified by email, the signing tab status with update depending on if email delivery was successful or not.
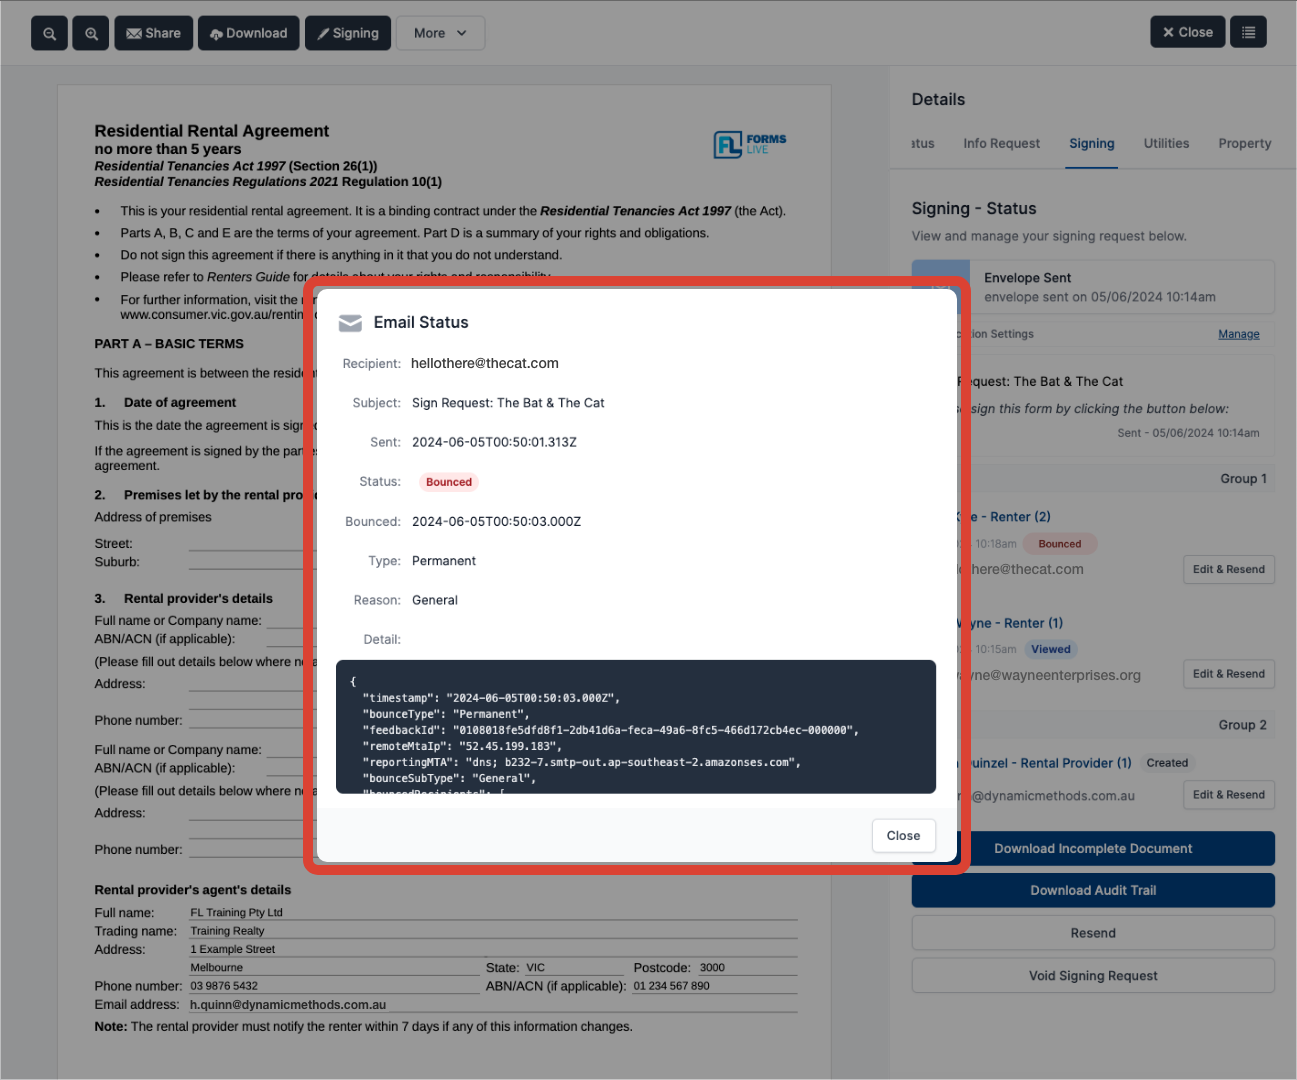
If the email has bounces and was not able to be delivered, a Bounced badge will appear next to the recipient's name.

Click onto the Bounced email badge to view the Email Status dialog – outlining the details of the incorrect email address entry.
To rectify, please proceed through the following steps:
- Click the
Edit & Resendbutton.

Navigate to the
Emailfield and Enter the correct email address.Click
Submitonce complete.

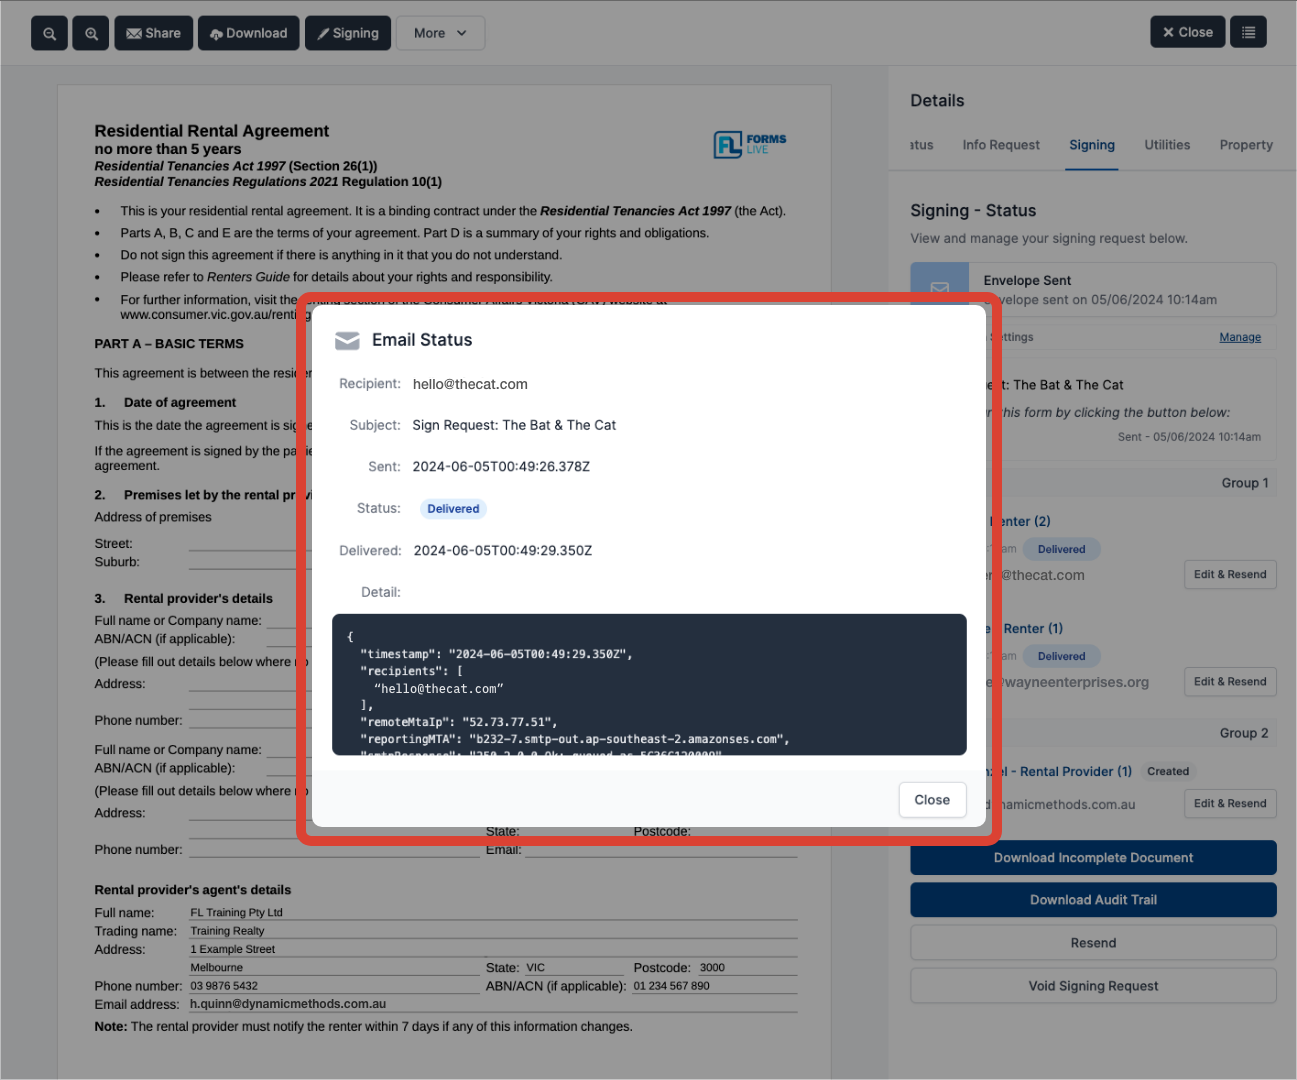
A Delivered badge will now appear to indicate the email was successfully sent.
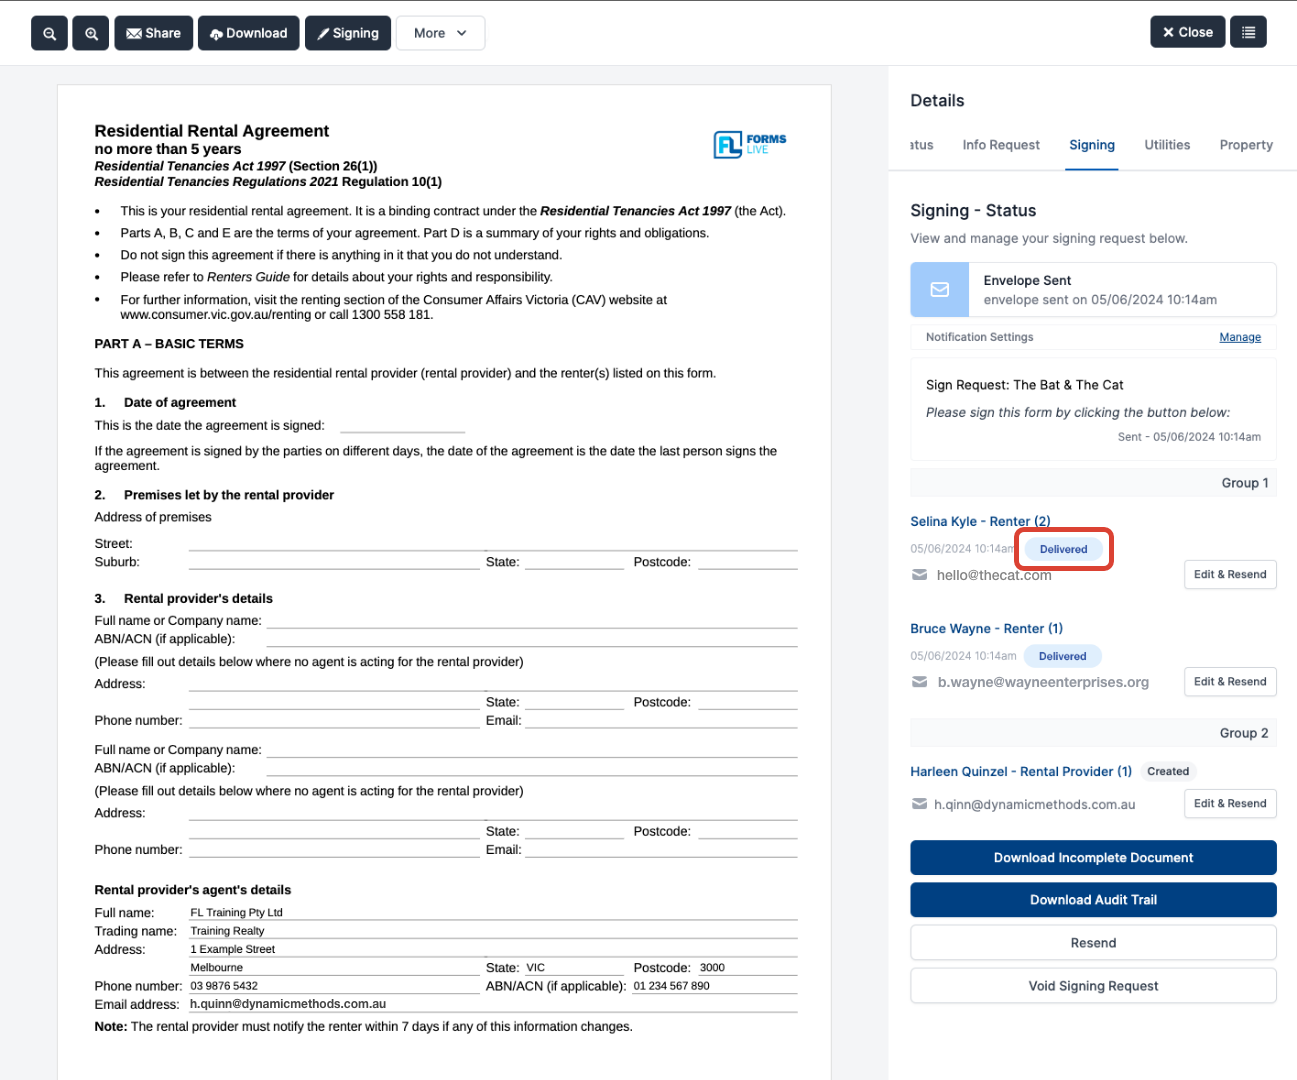
Click onto the Delivered badge to view the Email Status dialog – outlining the details.
Status Legend#
A full breakdown of the signing status notification badges.
