Capturing an ID Verification process
info
Clients will receive a verification request via email or SMS from Scantek to start the verification process.
Capturing an ID Verification#
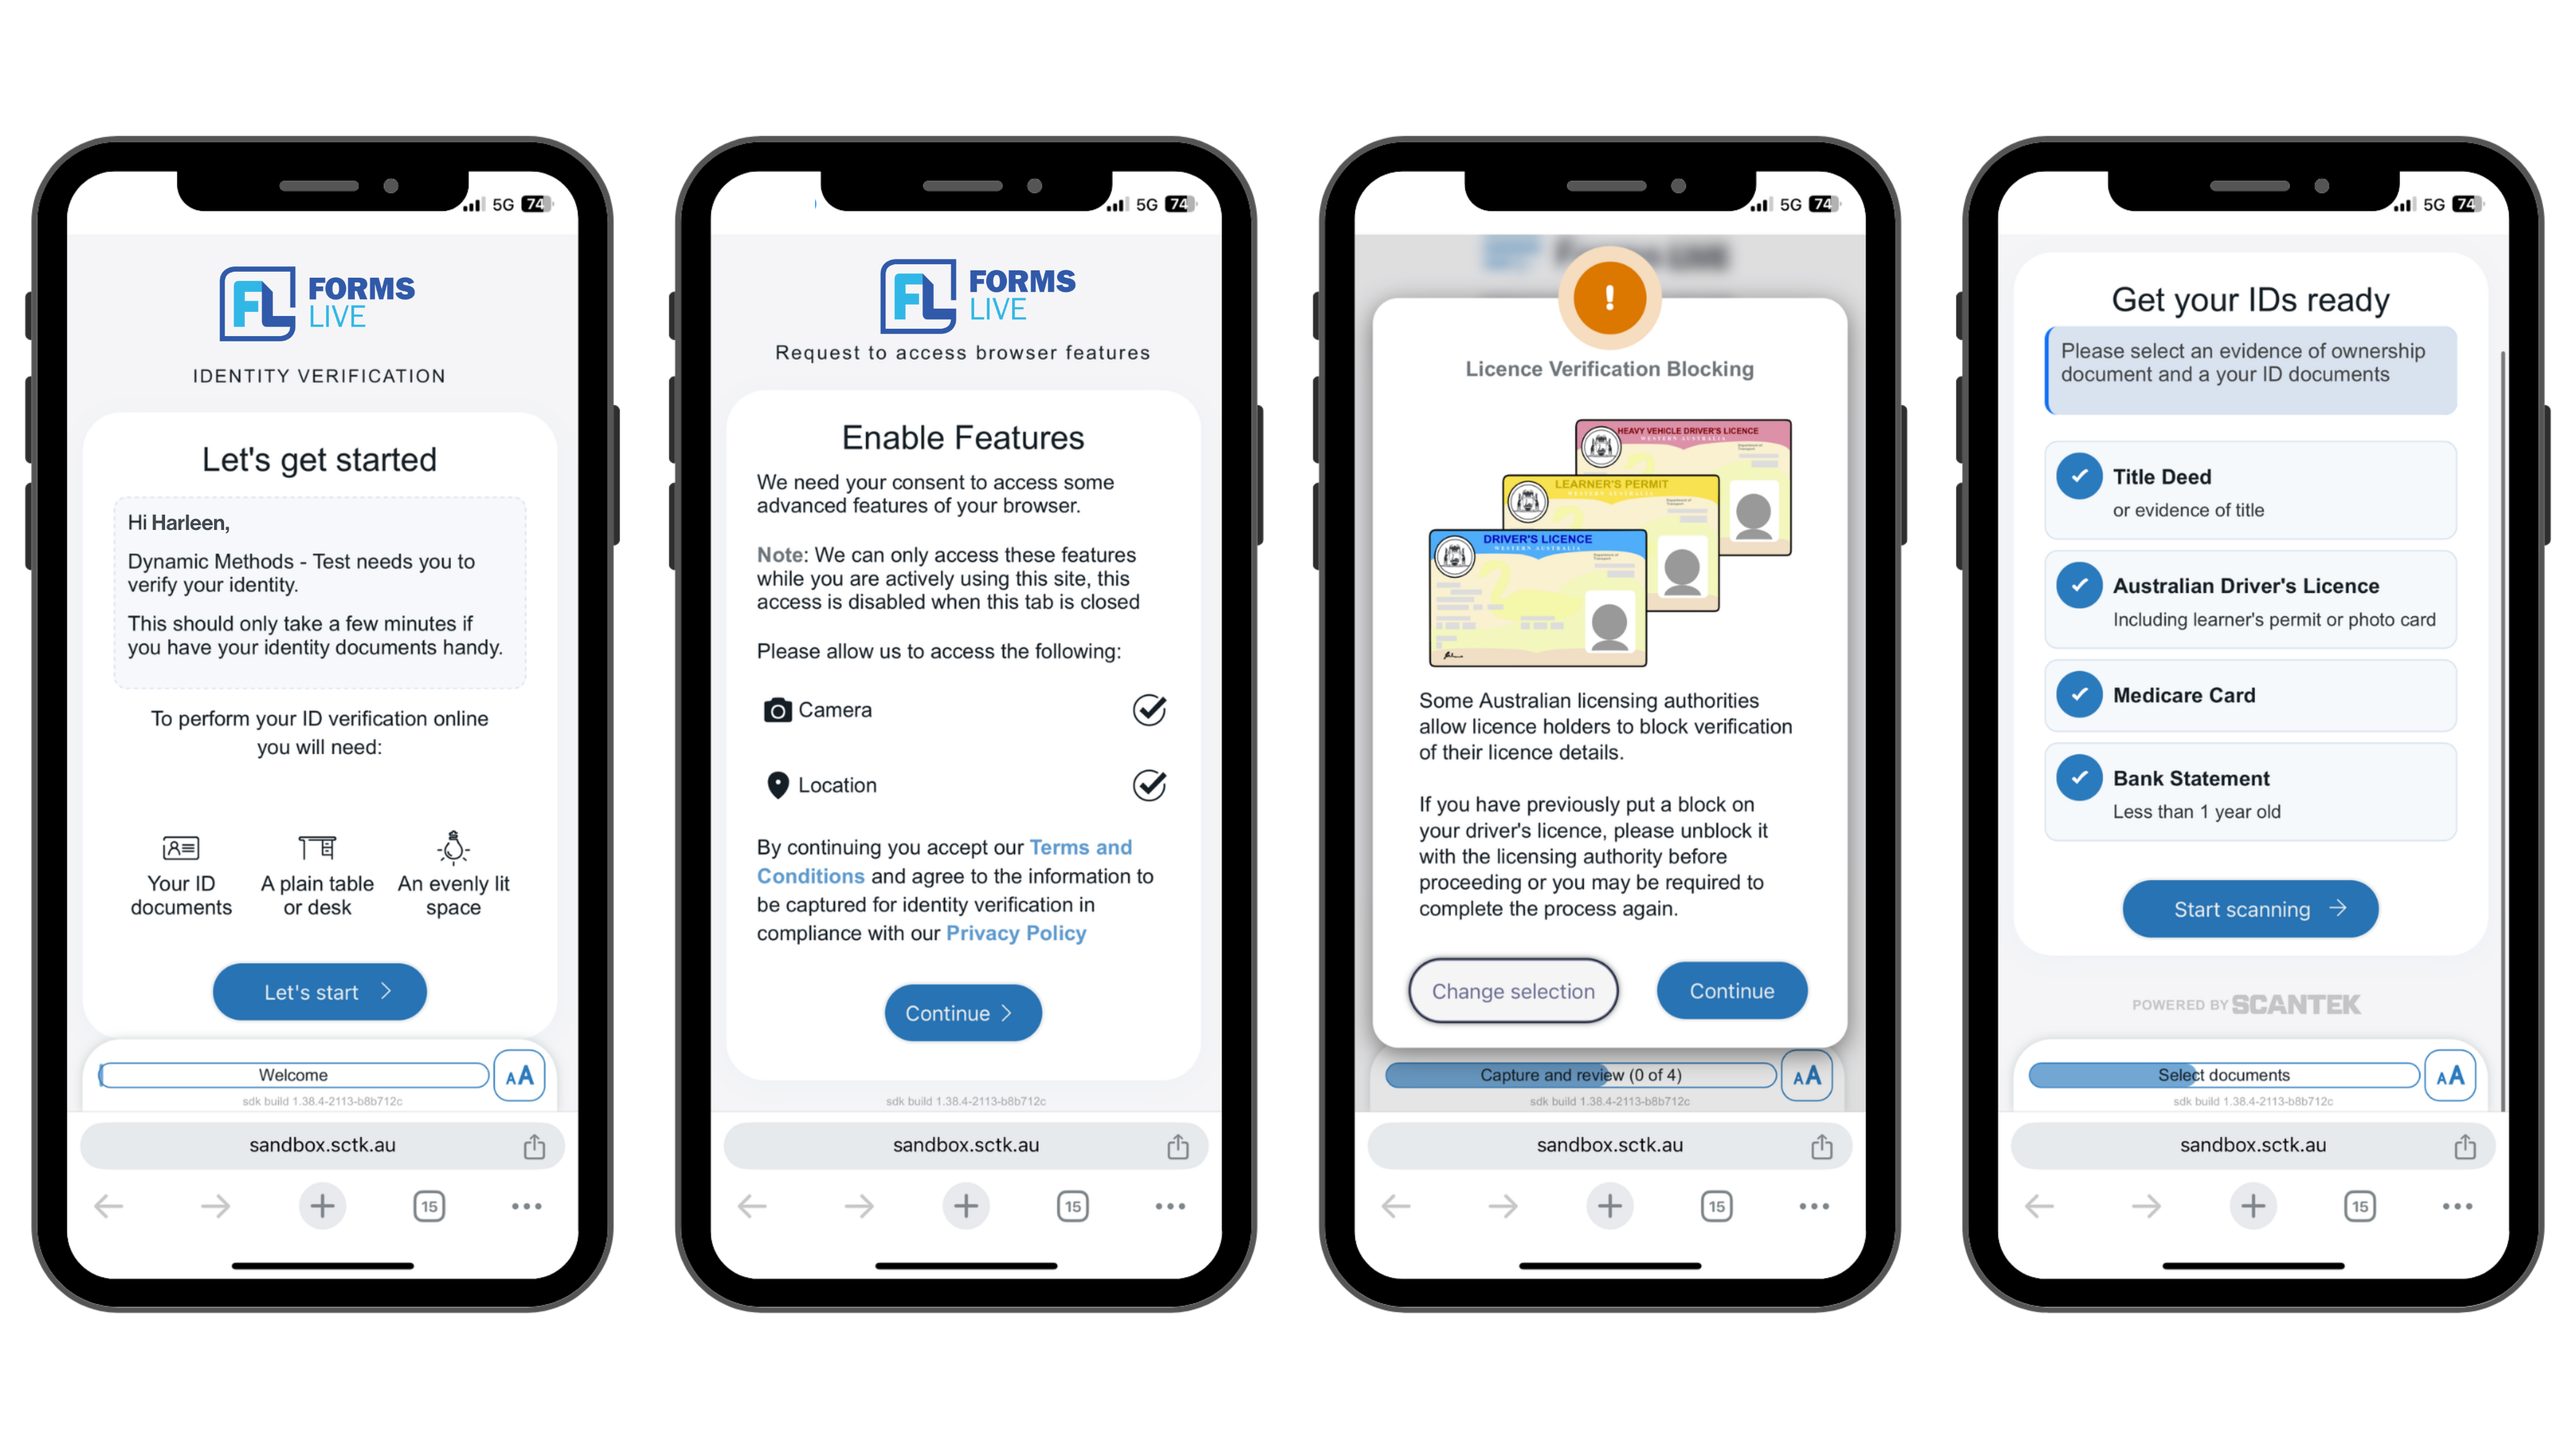
Tap the link in the email or text message - if on desktop, scan the QR code.
Review the requirements and tap
Let’s start.Follow the steps as prompted.
✅ Tap the
CameraandLocationfields to enable these features the tap continue.✅ Review the
Licence Verification Blockingscreen then tapContinue.✅ Select and tap the the
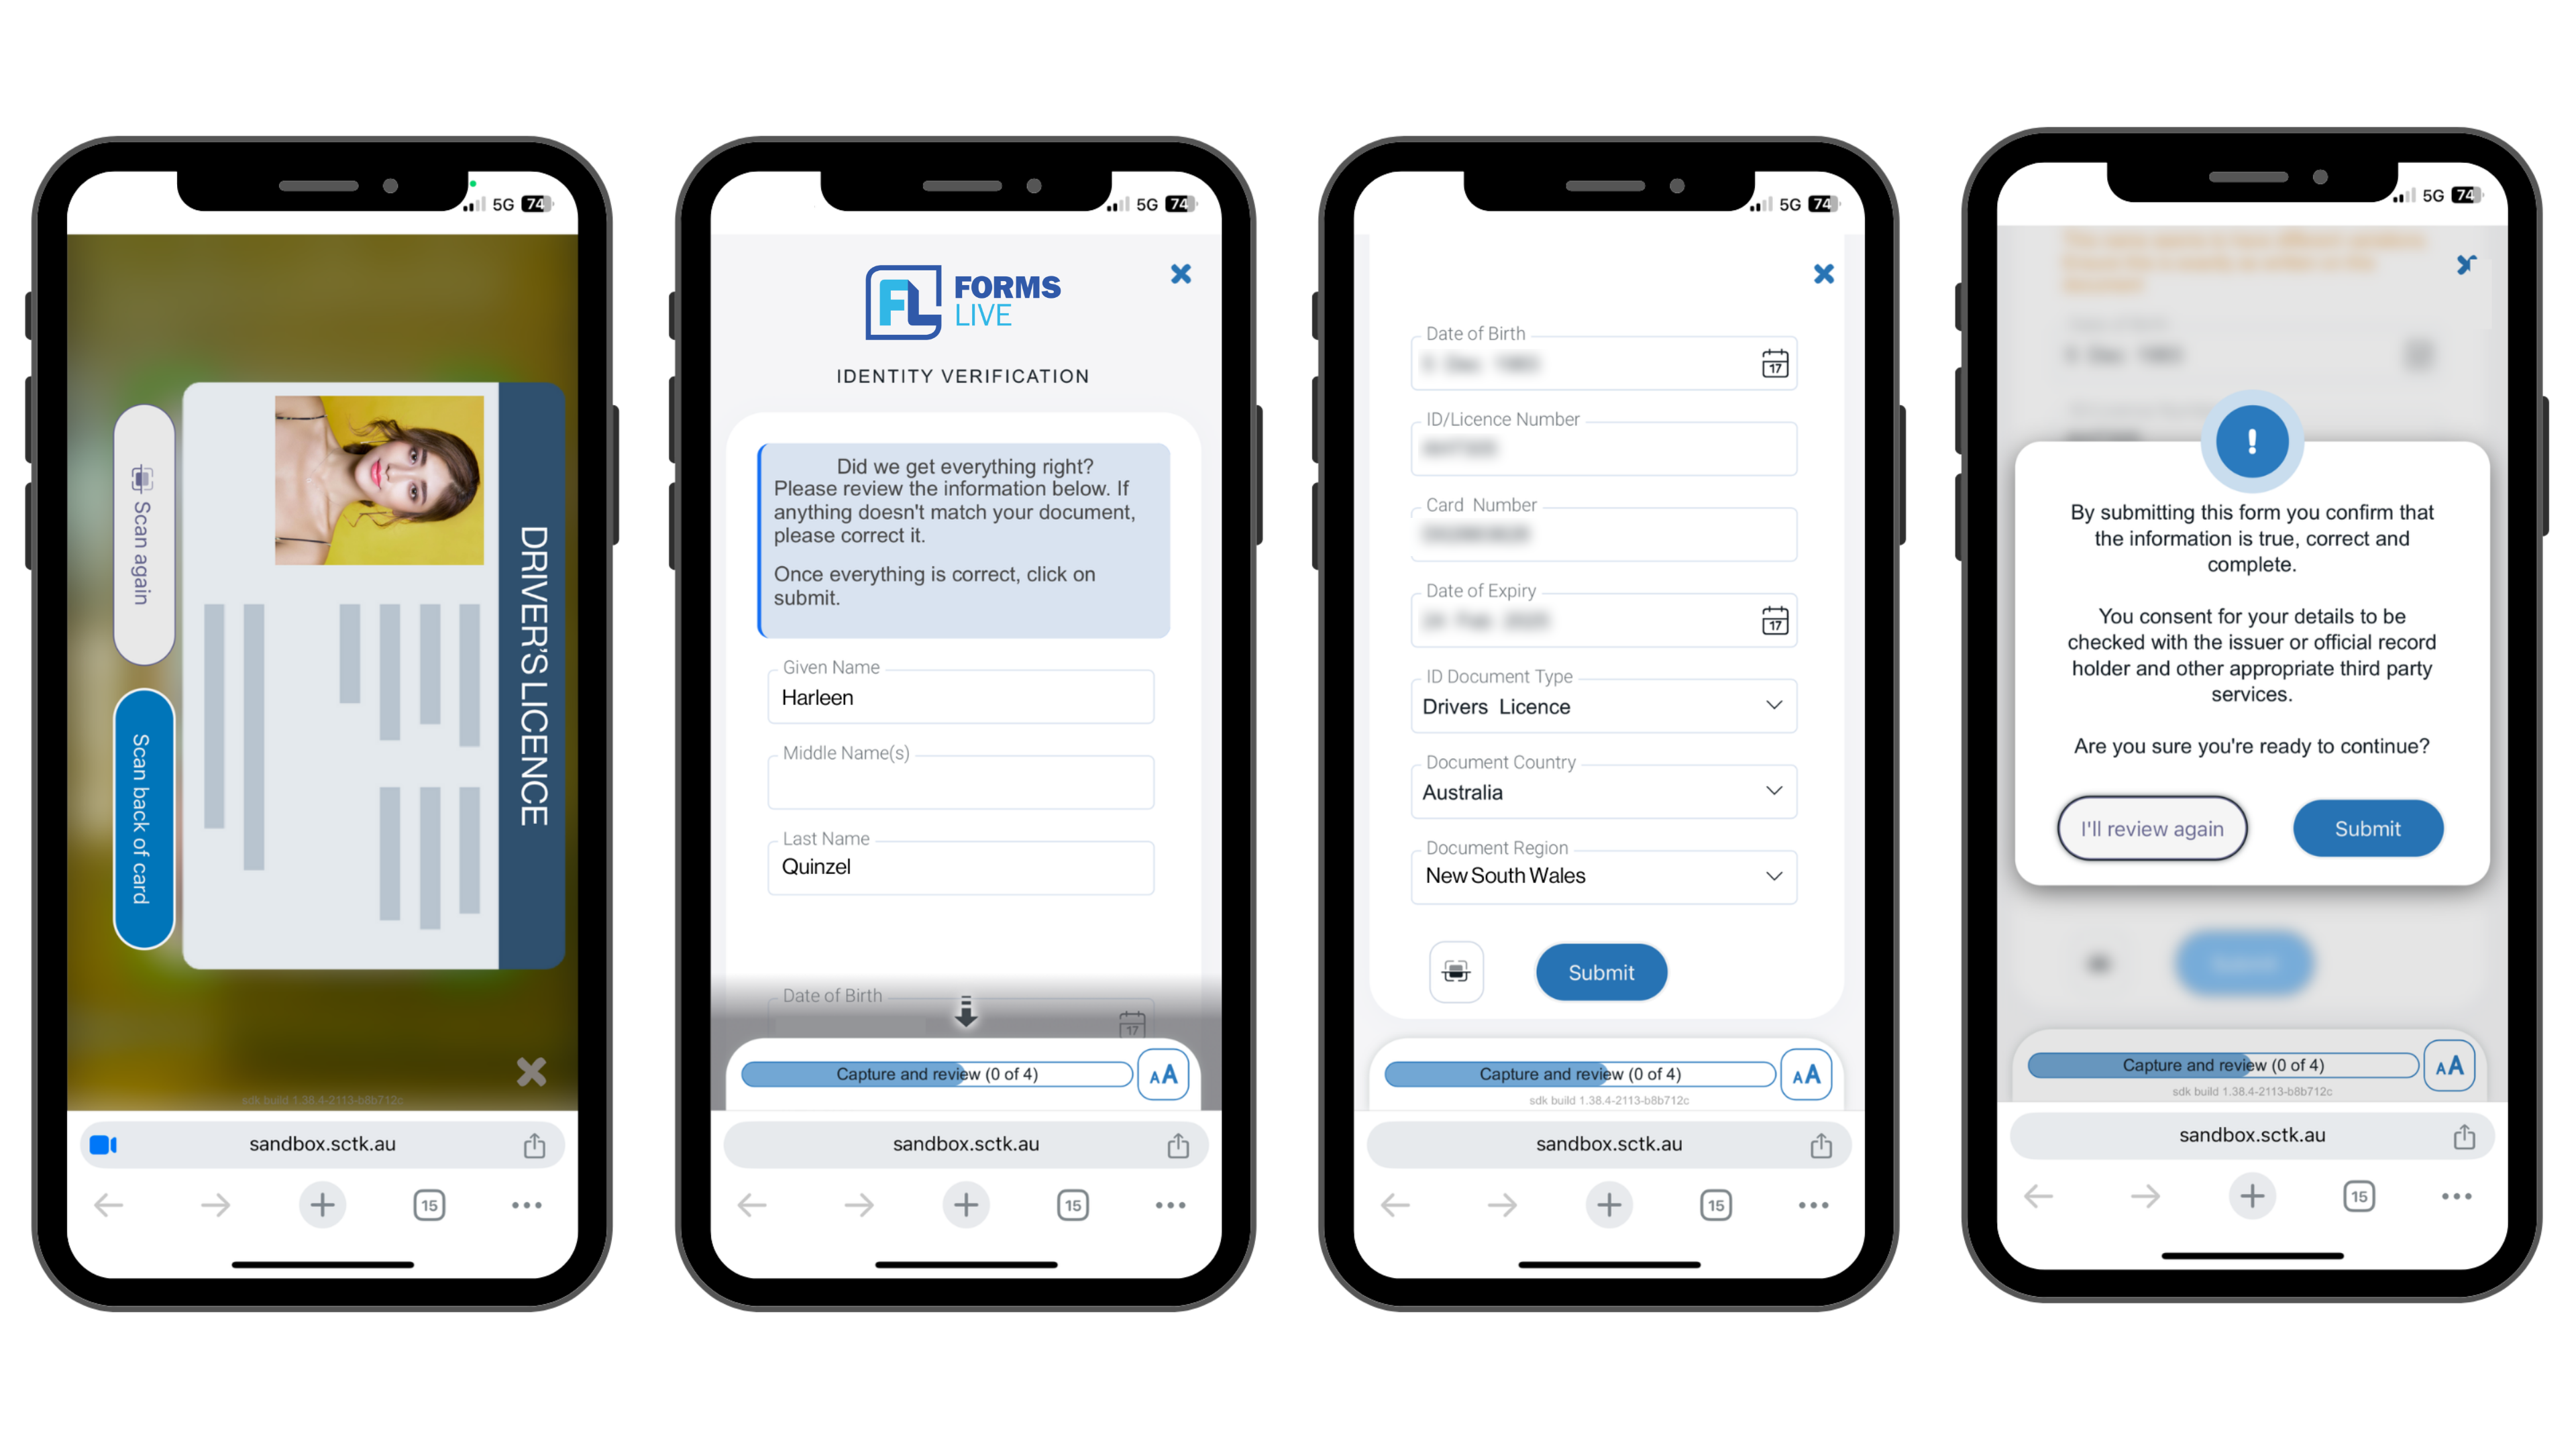
evidence of ownershipdocument and yourIDdocuments.✅ Capture the front and back of your driver’s licence.
✅ Review the information captured and edit, if necessary, then tap
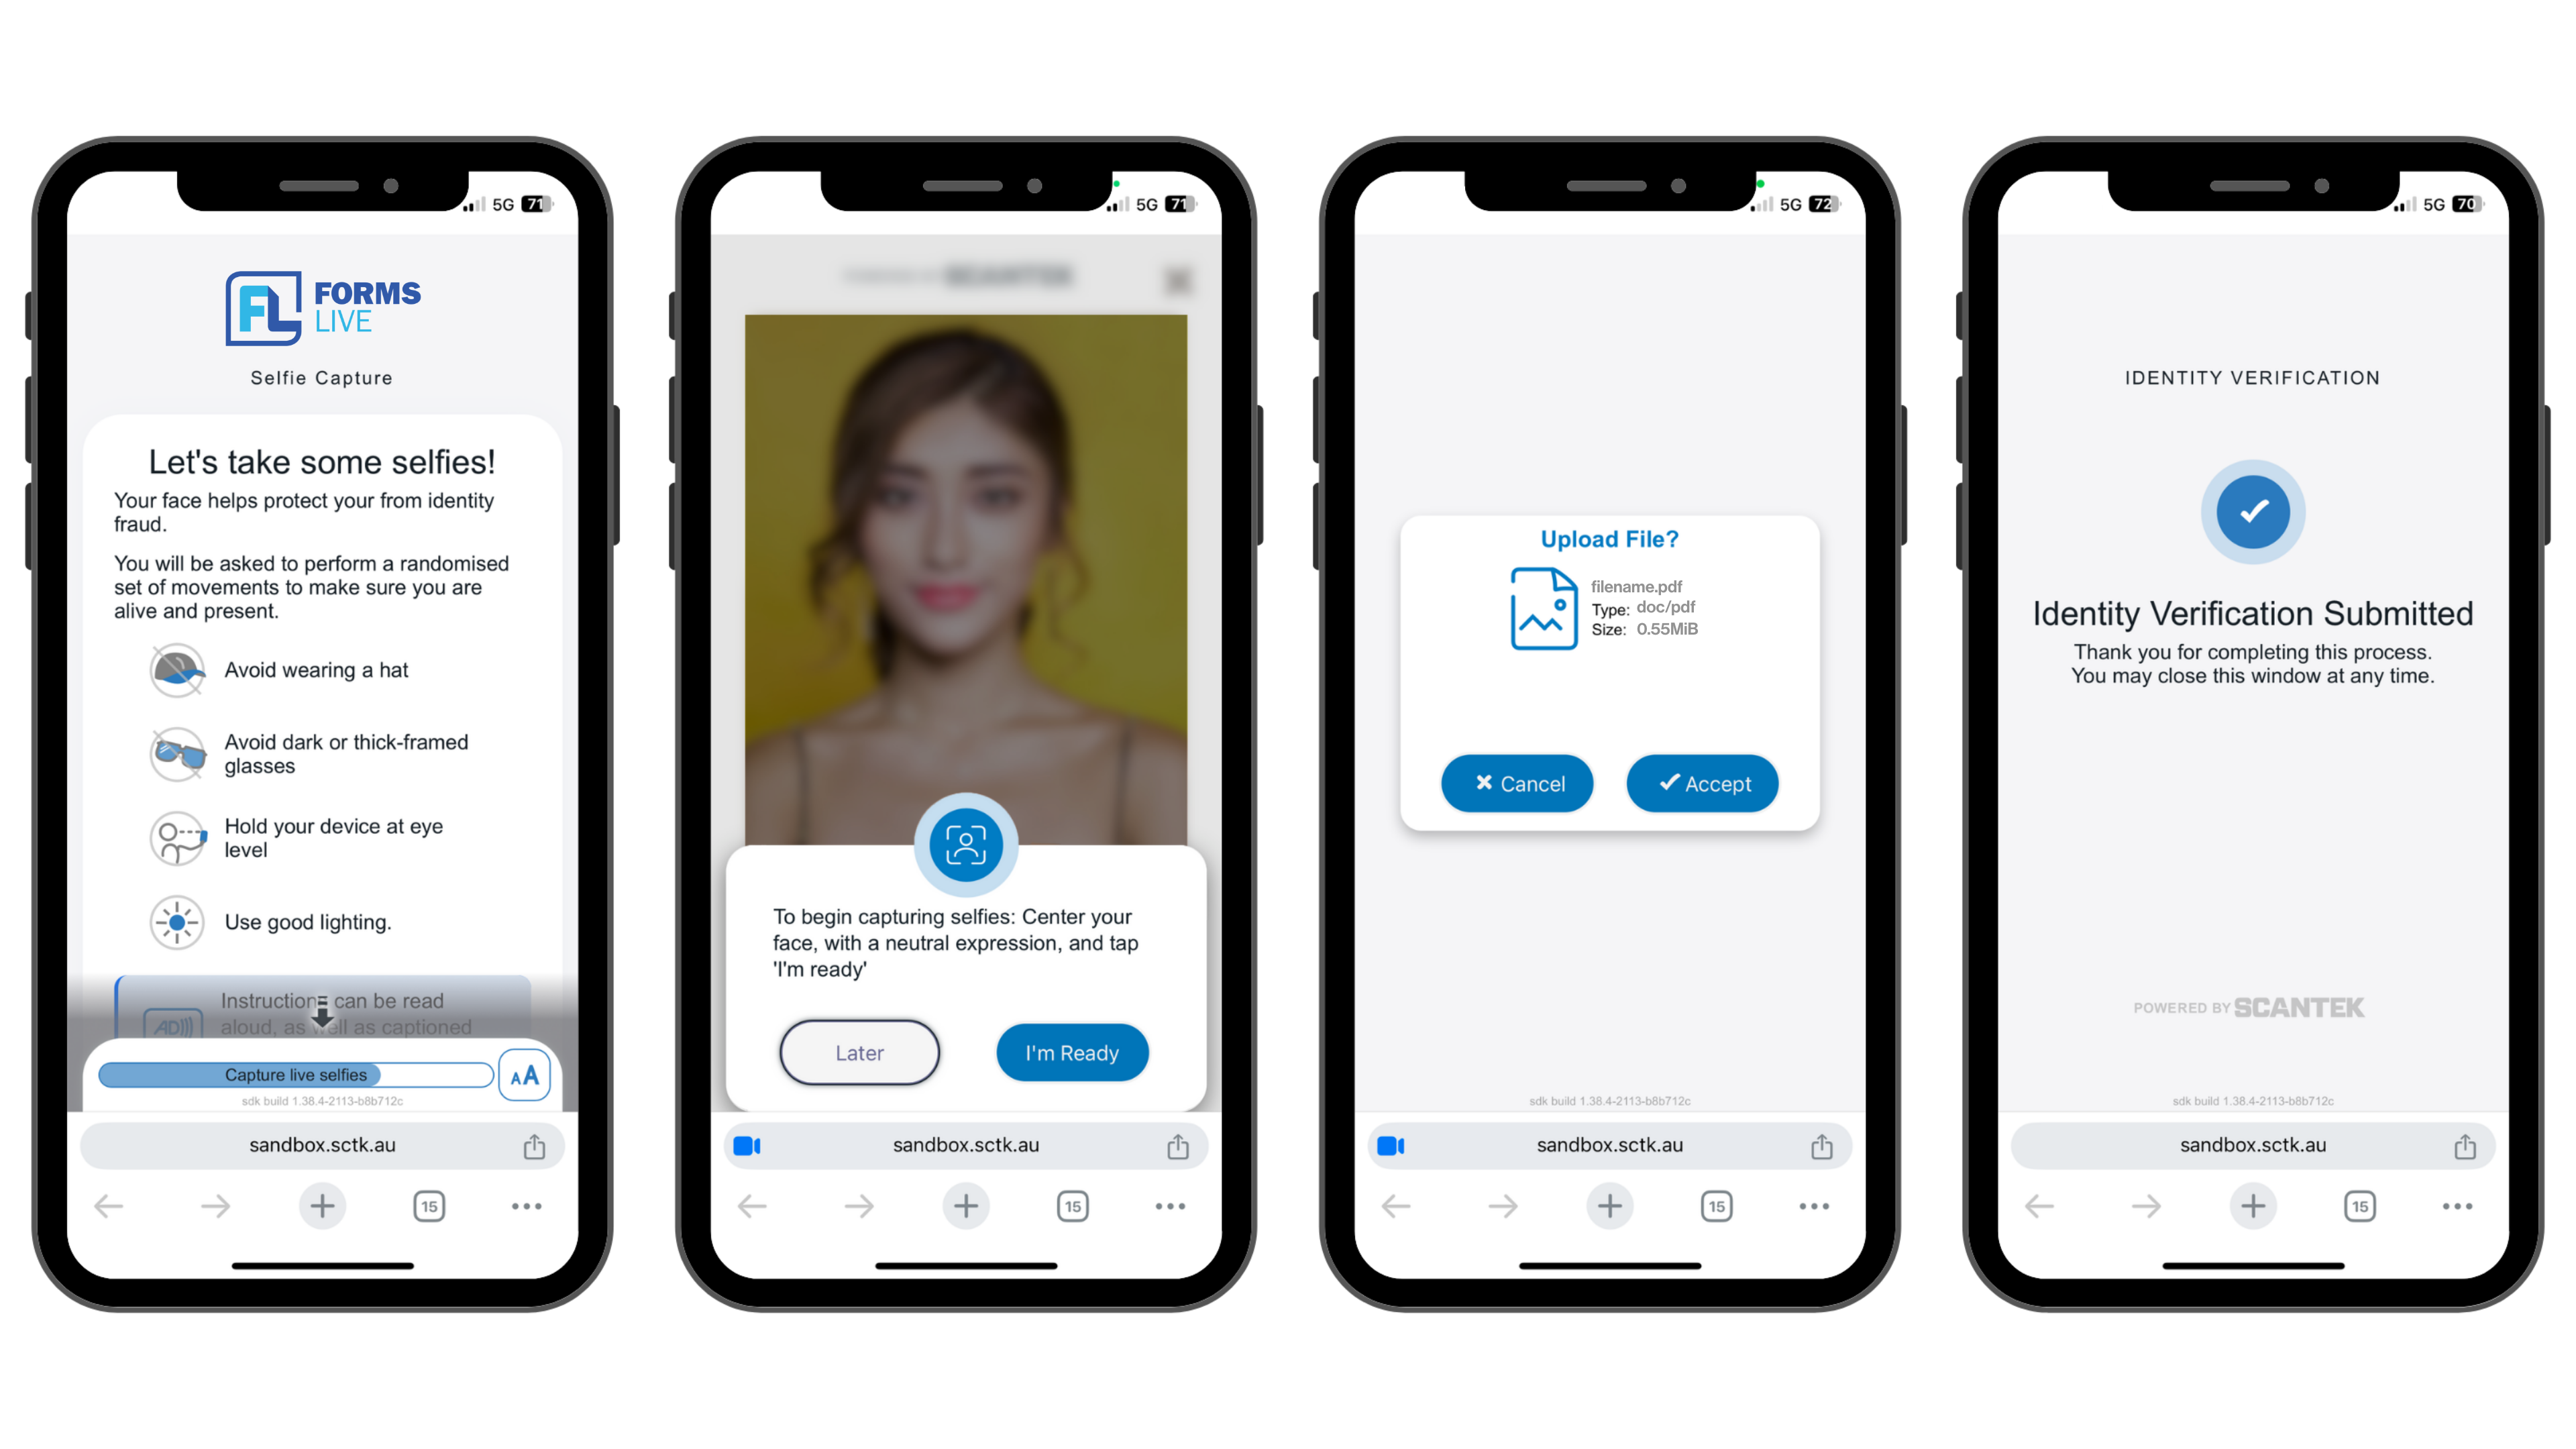
Submitto confirm details.✅ Follow the selfie prompts to guide you through a random series of head and facial movements.
✅ Tap the
ownership documentto upload the file, then tapAccept.Close the window once the
Identity Verification Submittednotice is displayed.
Example ID Verification Process#
The following example outlines the process a client will go through when verifying their identity using an Australian Drivers Licence as the primary form of ID.
Viewing the Status of an ID Verification#
The ID Verification sidebar status badge will update to Review once a Scantek verification has been completed.
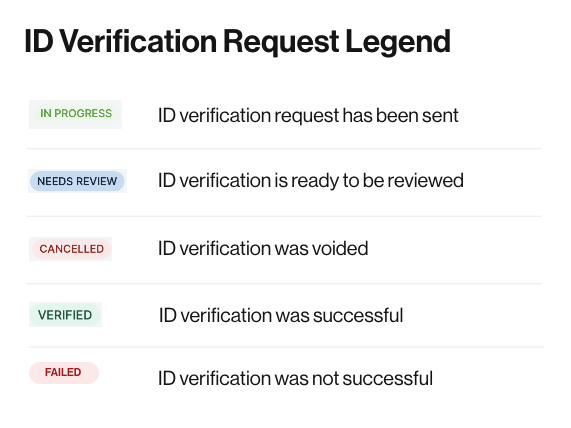
The status badges displayed include:
In Progress – ID verification link has been sent.
Needs Review – ID verification is ready to be reviewed.
Cancelled – ID verification process was voided.
Verified – ID verification process was successful.
Failed – ID verification process was not successful.